It is possible to enter participants individually, but it is a lot easier to upload them from a previously prepared spreadsheet. So let’s zoom in on how to upload participants.
How to prepare your spreadsheet?
You can have a spreadsheet with any column name and order, but if you would start from scratch, it is recommended to choose the following column names:
| Bib* | First Name* | Last Name* | Gender | Category* | Tags | Club | Country |
*mandatory columns
Remember that in RaceGorilla:
- Bib numbers do not have to be unique, except when used in combination with the keypad entry at the finish (It is recommended in general to have unique bib numbers). Bibs can also contain characters.
- Gender has to be either male, female or mixed
- The category must exactly match the category in you RaceGorilla Competition
- Tags can be anything you choose to make an extra indication of a participants status, such as U23, HC, or Suit or Skin. If a junior goes into the elite race using a swimsuit you can separate the two tags by a semicolon: U19;Suit.
- Country must exactly match the list of countries in RaceGorilla (in English)
In the RaceGorilla dashboard
The RaceGorilla dashboard can be entered using the same login and password as used when entering the app.
After creating and opening your competition, you’ll see the settings screen and a menu to the left.
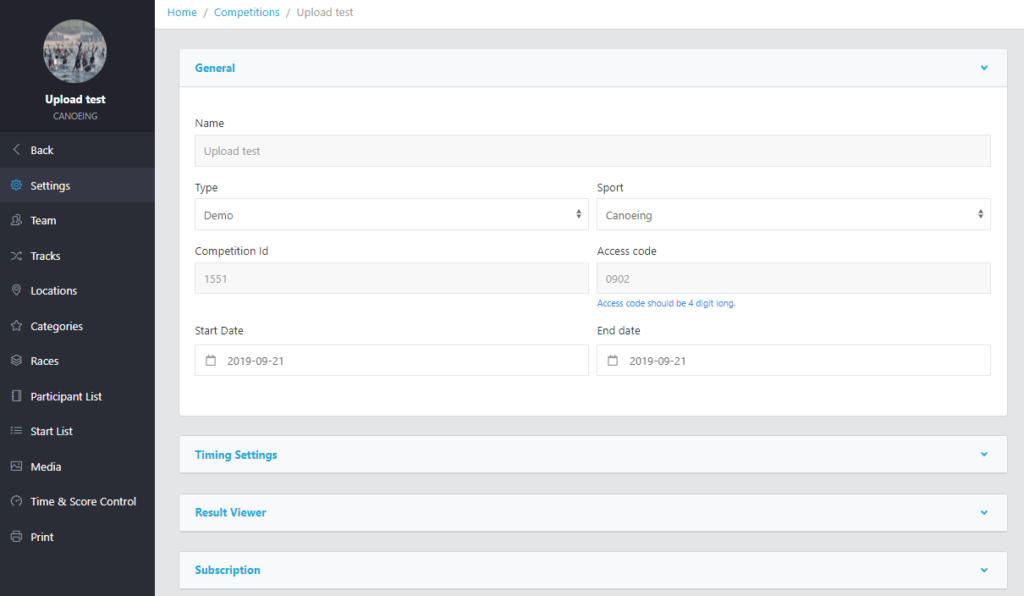
By default your competition is in of the type “Demo”. Demo mode offers full functionality up to 10 participants. This should be enough for you to practice using the software. More about these setting can be found in the dashboard tutorial and at the pricing page.
Uploading the participants
As stated earlier, the category names of your upload file have to exactly match the categories in your RaceGorilla competition. So you’ll first have to set the categories. By default the categories Men and Women are used in most pre-set formats.
After entering your categories, go to participant list. In the upper right corner you can choose upload participants.
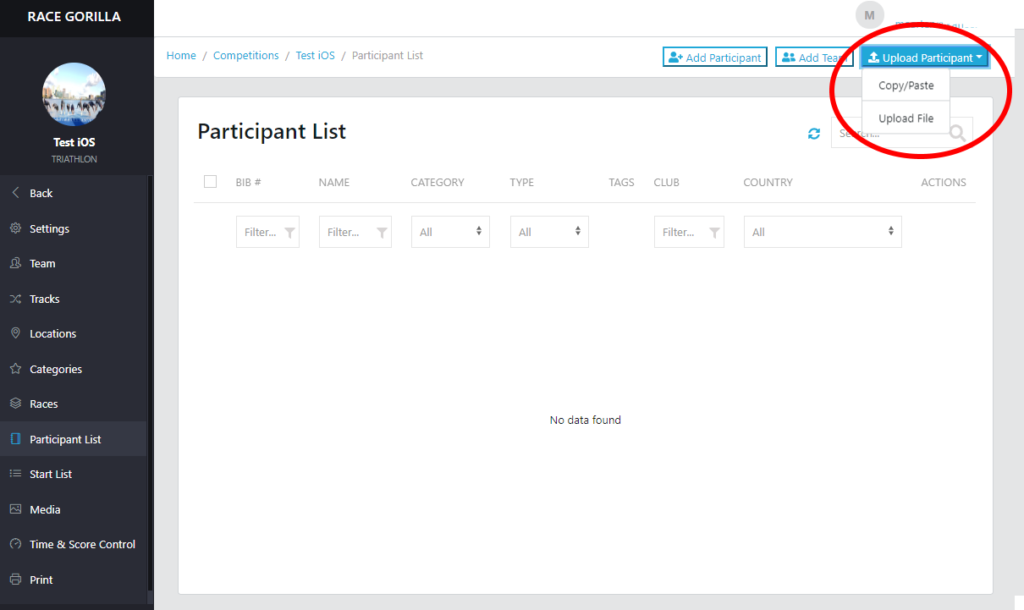
Then its up to you whether you want to upload a file or just copy paste a selection of participants.
As an example, you can just copy paste this table including the headers:
| Bib | First Name | Last Name | Gender | Category | Tags | Club | Country |
| 1 | James | Watson | male | Men | U19 | ABC | Australia |
| 2 | Jean-Claude | Leonard | male | Men | Ajax | France | |
| 3 | Markus | Brummer | male | Men | Real Madrid | Germany | |
| 4 | Guan | Da Silva | male | Men | Juventus | Spain | |
| 5 | José | Balke | male | Men | Arsenal | Germany | |
| 6 | Andrea | Dumoulin | female | Women | U19 | Red Sox | Netherlands |
| 7 | Valerie | Bergman | female | Women | Juniors | Czech Republic | |
| 8 | Suzan | Jansen | female | Women | Santa Monica | Italy | |
| 9 | Michiel | Stock | mixed | Women | Red Sox | United States | |
| 10 | Joost | Welling | male | Women | Juventus | Bulgaria |
Continue by pasting the table into the designated area and tapping “next” to accept the data. You have to assign each column of your data file to the correct RaceGorilla data format. As the column headers already match the RaceGorilla column names, in this case it is a matter of assigning the correct column by tapping save.
Then tap “verify data”. A screen is shown indicating the number of records that will be imported. This picture below is to show what happens when a certain item does not match:
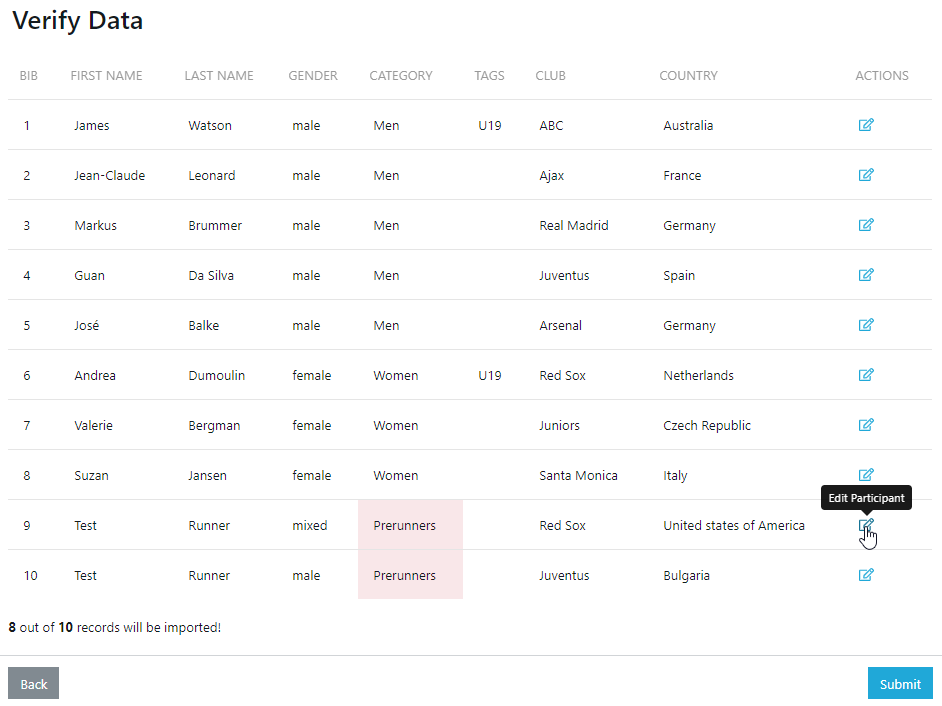
The category Prerunners is unknown to the RaceGorilla. You can still submit the data and only 8 participants will be imported. The best solution is to go back to add the Prerunners category and upload the file again. If you want you can edit here and assign the prerunners to either Men or Women category.
Uploading a file works largely similar to the copy paste process. You can upload .CSV, XLS, XLSX. Be aware that only the first sheet of the excel file is imported and that all rows / columns containing data are being imported (if the data is correct)
Participants to races
By default all participants are placed in any race that matches the category. Usually, there is only one race per category. However, in some sports there are 2 or more runs or series (or stages) and the participants will be placed in each of the races of that category (see also the tutorial about competition structure).
This is what one would normally want, but as always, there are certain competition formats that require a different approach.
Advanced settings
If do not want your participants to be placed in all races or series, switch off the toggle or select a series. Switching off the toggle does not place any participant in any race. This means you will have to that that manually later. When just selecting one of the series, the participants will be placed just in the races of this series (for example just the heats, and not to the semi final and final).

Placing participants to races manually
If you have chosen not to assign the participants automatically, there will be a warning shown in the participants list.
In order to warn you about this issue, an exclamation mark is shown in front of each participant that is not present in any race.
Tag the participant that you want to place in a certain race, choose the button “Place participants in races” and select this race in the drop down box.
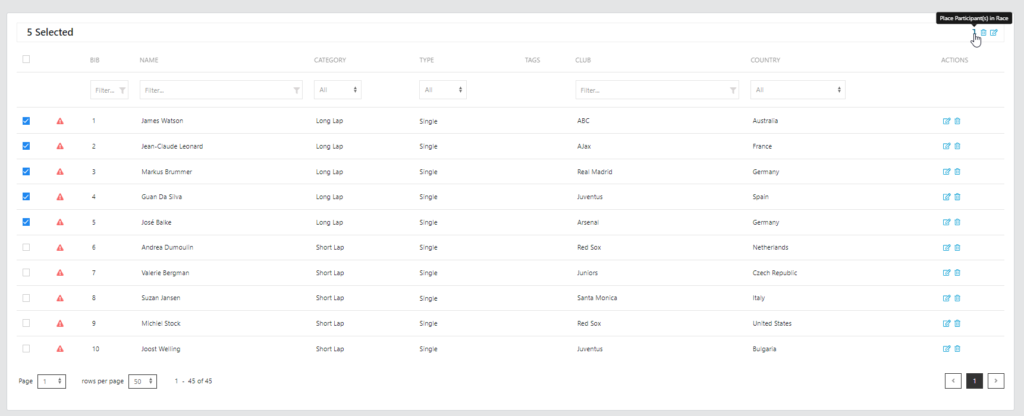
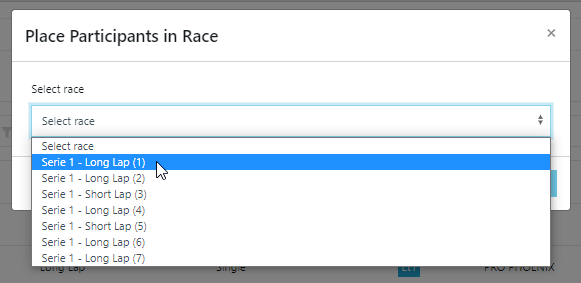
The participants will now be visible in the start list. Go to the the start list section of the dashboard to manage or print the start list.

